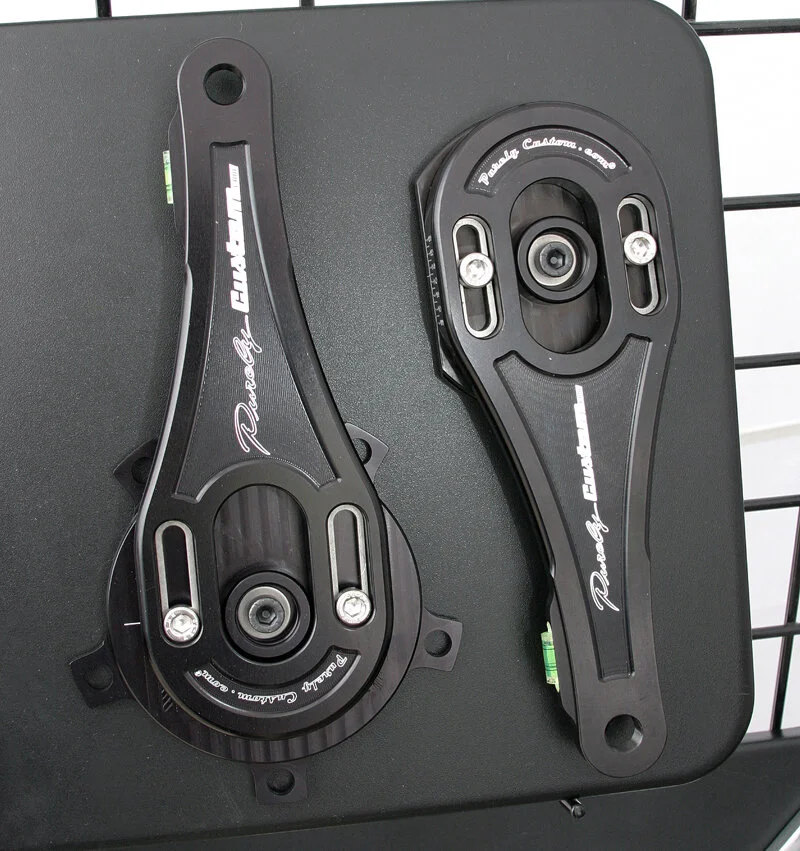
MOuntain bike bar sweep: all you need to know.

Let’s talk sweep for mountain bike bars. There are lots of options out now which is great as there is something for everyone!

First of all, let’s get it out of the way. People are different. I feel smart just saying it. There WILL be someone that disagrees with this and rides super sweep bars, flat bars, or drop bars on their mountain bike and love them. Keep loving them. 

Now, moving beyond “people are different” and “it depends”.

Let us assume here that bar width is close to what I consider natural, about the same width you would do pushups at and the bar drop and reach isn’t crazy. If you hold a bar in front of you about halfway to your chest you will notice your upper arms “bird wing” about 30 degrees out from your torso. Notice if you really force them you can bring them up to about parallel to the ground or if you force the elbows down with the bar in the same position you can maybe get them to 15 degrees out from your ribcage.

This means about 30 degrees upper arm away from torso is pretty normal. Now that the hand is in position we can talk about the angle of it. We want the wrist here in a position where it is balanced in ulnar and radial deviation or if you think about throwing a punch, the wrist would be straight….basically it would take an equal amount of load on either side of the thumb or the pinky to deviate the wrist. THIS is neutral.

Also you can turn your forearm vertical with palm toward you and hold a bar with equal weights on each end and see what angle the bar lands at to balance itself. For me this was about 8 degrees relative to the forearm.

Guess what? I ride an 8 degree backsweep bar. This gives a comfy and efficient position where force can be transmitted through the bars and through the upper extremity without undue stress on the wrist. 

I would encourage everyone to try this as you might like a bar close to 15 or 20 degrees sweep. I have heard folks mention holding pencils out in front of you and seeing how they point. I think this is a poor test since there is NO load put through the joint and the other relevant upper extremity angles aren’t the same as on a mountain bike. Yet again, if you think that test rules and mine is awful, that is cool with me.

There ya have it. I think the stock 9 degree sweep on most bars is really nice and a good starting point. If you want to try down to 6 degrees or up to the higher sweeps feel free to but beware as the sweep increases it typically forces a riders elbows down to their ribs giving less leverage in technical riding. This could be fine for a commuter or touring bike maybe. Shoulder injury status can also impact bar choice here so if things hurt...try some different setup tactics. Same for hand and wrist pain or numbness. If a normal setup isn’t working, try a less normal setup!

For most bars the logo near the stem should face forward and you can fine tune that rotation to your comfort but be careful not to roll them too far forwards as this tends to make people lock the elbows. I also check and document upsweep measured at the grip. This improves setup consistentcy. Hope that helps and I’m happy to answer any questions!

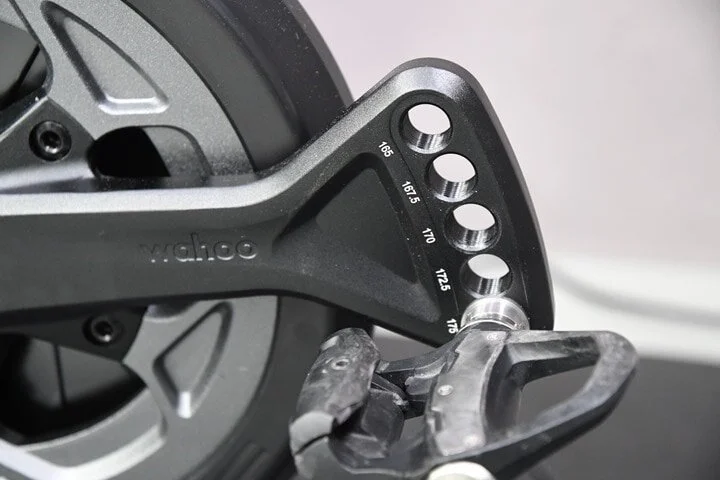
Crank length. The long and short of it.

Are you on the correct length cranks?

Maybe a better question is “does one crank length work perfectly for everybody?”

I know that is overly simplified but I think it makes the point early on here. Of course it matters! Repetitive activities are more comfortable and efficient with a certain dimension for the feet to travel. Think about watching a toddler navigate stairs...a bit scary due to their balance but more relevant to this discussion is how awkward it is biomechanically due to the mismatch in step height and leg length. The stair climbing session would be much easier for them if the stairs matched their legs!

From a variety of studies over the years, there is a general consensus among bike fitters and manufacturers that riders can use a variety of crank length across a fairly broad spectrum with no detriment to power or gross efficiency while riding. There is also a tendency among researchers and fitters to recommend a shorter crank length when in doubt. I am not going to jump into the ratios between femur and crank length and all that as I think it is a bit of a distraction from more relevant issues here.

A 2017 study led by Ferrer Roca concluded -  “At the same time, the maximum flexion and range of motion of the hip and knee joints were significantly increased (1.8–3.4° and P < 0.05), whereas the ankle joint was not affected. In conclusion, the biomechanical changes due to a longer crank did not alter the metabolic cost of pedalling, although they could have long-term adverse effects. Therefore, in case of doubt between two lengths, the shorter one might be recommended.” There is a less often cited study from 2010 involving female mountain bikers that showed shorter cranks allowed them to return to peak power quickly from a coasting state. Think about how often that scenario plays out in cyclocross or mountain bike racing!

Now, from here, it easy to just toss the discussion into the bucket labeled “Oh Just Do Whatever You Want”.This is not totally wrong but we can travel a bit further in the quest to optimize the bike to the rider. There are a few formulas out there and honestly, the only one I really trust comes from the guys at BikeDynamics. Check their site out below:

http://bikedynamics.co.uk/FitGuidecranks.htm

I usually consider biomechanics of the rider as my primary guide for selecting crank lengths. This is most commonly an issue for riders under 5 ft 5 inches in my experience. What this really comes down to is this. Does the rider have the joint mobility to easily get through the pedal stroke? The easiest way to check this is the following:

Put the bike in the trainer

Get  in the drops or aerobars (whatever the lowest torso position is)

Align the cranks parallel to the seat tube

Unclip the top foot and rest it on the pedal

Raise the top foot off the pedal without contorting yourself. If this is really tough I get a bit concerned the cranks may be too long. Ideally there should be some surplus movement leftover. This is a combination of actual mobility of the hip joint in the socket AND the stretngth of the hip flexor muscles to pull the leg upwards. This exercise assumes the rest of the position is close to correct of course…

Another red flag for me is riders with complaints of difficulty finding a good saddle height as they are close to the border of too low AND too high at the same time. Other complaints I have seen associated with too long cranks are the feeling of always being in the wrong gear climbing and the hips rocking excessively side to side during standing climbing.

Between these tips and the Bike Dynamics link above, you should have a reasonable starting point for getting the crank length that matches you and your goals. As I mentioned before, if you are not sure, I generally steer riders into a shorter crank length. Another thing I will mention is that I do not think it is imperative the cranks are the exact same between all the bikes a rider has. For example I happily ride 175mm cranks on my mountain bike and 172.5 on my road bike...BUT if I rode a TT bike I would 100% be on 165 cranks. 

Side note for mountain bikers: Many folks are going to 165 or 170 cranks on mountain bikes to reduce pedal strikes on rocks. Definitely worth considering if you have this issue.

I hope this provided some clarity on what is a hotly debated topic in the cycling world that too often ends with the caveat of “Well, it depends.”


IMG_1885.jpeg
IMG_1884.jpeg

Bar height: how low can you go?

I see articles from time to time on bar height and while they are good material they often leave you with a couple take home points:

  1. It depends on the rider

  2. Go see a professional bike fitter

Both are correct but I want to go a step further here in the interest of helping riders learn more about how their body affects their position. Knowledge is power, or something like that.

This is mostly applicable to road and triathlon/TT folks as the bars tend to be much lower than on a mountain bike or hybrid. Lower bars have some definite benefit in regard to aerodynamics and power production...as long as the position suits your individual anatomy!

Here we are. We want to know where the bars go. First you should make sure you are happy with your seat position THEN mess with the bars. If you are unsure, take some time on Steve Hogg’s website, then set your seat where it is comfy and powerful...complicated, I know.

https://www.stevehoggbikefitting.com/bikefit/2011/02/seat-height-how-hard-can-it-be/

From here, the three biggest limitations to riding lower bars I see are:

  1. Hip flexion - How far your knee can rise up towards your chest

  2. Neck extension - How far your head can tilt back (imagine the last sip of a canned drink)

  3. Hamstring flexibility - How far you can bend over toward your toes

To test all this I would check each thing in order from bar tops, to hoods, then drops. Also worth checking is the aero hood position many riders use. Hands on the hoods then drop your elbows to where your forearms are level to the ground and you look more like you are on a tri bike. If any of these tests give you trouble in the lowest positions(drops or aerobars) you might have your bars too low. Conversely, if you have plenty of motion leftover, maybe you can try a bit lower! Slam that stem! Well, sometimes. Maybe. Let’s move on.

You can test all this on a trainer (in front of a mirror is great) or a safe, flat road free of traffic. For the leg tests, try left AND right.The idea here, is for a repetitive activity, don’t work to the absolute limits of your flexibility. Much like a savings account, a bit of a surplus is a good thing!

  1. Hip Flexion - In your chosen bar position, stop with one knee at the top of the pedal stroke (cranks should be in line with seat tube) with foot unclipped but resting on top of the pedal. Slowly raise the foot off the pedal and the knee rising towards your chest. You should be able to do this without discomfort or difficulty. Also maintain the same back position...don’t curl up in a ball.

  2. Neck extension - While riding and looking up the road as you normally would, tilt your head up without changing your torso or arm position like you wanted to see the sky. If you can’t do this...TOO LOW.

  3. Hamstring flexibility - With one leg at the bottom of the pedal stroke (cranks should be in line with seat tube) and knee slightly bent try to lean your torso forward some more (starting from the bar top position and moving gradually lower). If the back of your leg tightens up right away, you might be close to too low.

After checking these, you will have a better idea of how YOUR anatomy affects YOUR bike position and will be better able to make decisions on your fit. An individualized approach helps us move beyond the answer “it depends”. For each of the tests, there are multiple factors at play, but the beauty of these is we don’t have to obsess over twenty different things!

If you have limitations, it is not bad news...it is simply how you are TODAY. That can change with some focused mobility and strength work over 3-4 weeks. Kit Laughlin’s YouTube site is my favorite one stop shop for improving flexibility. https://www.youtube.com/user/KitLaughlin

Whatever position you choose, you should feel relaxed and powerful while riding. If you make a position change, give it a couple rides before making a decision. 

Riding goals and duration are also factors. A dedicated criterium racer will likely ride lower than a new rider looking to knock out their first century. Looking pro is great but the real priority is being able to perform. Good luck and as usual, hit me with any questions.


Hip Flexion

Hip Flexion

Neck Extension

Neck Extension

Hamstring Flexibility

Hamstring Flexibility